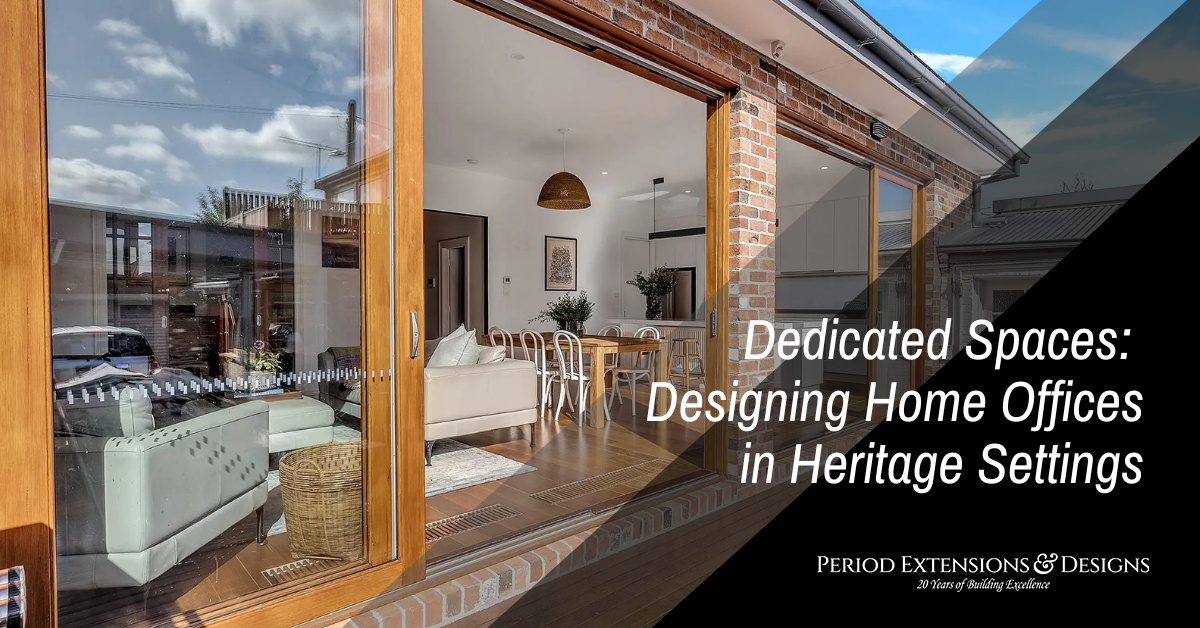
Modern home office in heritage room with timber floors and decorative period features.
CategoriesPeriod Home Renovation

Dedicated Spaces: Designing Home Offices in Heritage Settings

Heritage homes have charm, stories and a strong connection to the past. But today’s world calls for modern needs, like a home office. So, how do you mix the old with the new without losing what makes the space special?

That’s the challenge many face when planning home renovations in Melbourne. The key lies in balance—keeping the soul of the home while adding spaces that work for how we live now.

Respecting the Past While Building for the Present

When working with a heritage home, it’s not just about knocking down walls and adding a desk. These homes often have protected features, detailed woodwork and original layouts that can’t be changed without thought.

But here’s the thing—those same old details can become the best parts of your new office. A bay window becomes a reading nook. Original brick or stone becomes a feature wall. High ceilings offer room for bold lighting or built-in shelves.

A thoughtful plan keeps what matters and brings in what’s missing. This may include insulation, better lighting, or simply a space where Zoom calls don’t echo like a church hall.

Some quick wins when designing in a heritage home:

  • Use natural finishes that match the era—timber, brass, stone
  • Avoid harsh, modern fixtures
  • Match new additions with the existing style of trims, cornices or archways

For those creating a home office that blends with your period home’s charm, this first step is vital.

Navigating Planning Rules and Heritage Overlays

Many heritage homes fall under local planning rules. These may limit what can be changed outside or inside the home. This includes windows, doors, rooflines and even paint colours.

In Melbourne, for example, local councils often require a heritage impact statement before any big changes. This protects the history, but it can slow things down.

So what does this mean for your home office?

  • Internal changes are often easier than external ones
  • Anything seen from the street must stay in line with the original look
  • Adding skylights or rear extensions is usually allowed with the right plan

Work with a designer or architect who knows these rules. They’ll help you navigate the red tape and still deliver a result that works.

You also want to make sure your new space is built to last. That’s where making smart extensions that maximise space and light really pays off.

Designing for Light, Air and Productivity

Heritage homes often have small rooms, narrow halls and limited natural light. These can feel cosy but make poor offices. So the design has to bring in light and fresh air without losing the old-world charm.

One approach is to add a rear or side extension using glass, timber and steel. These materials contrast gently with brick or weatherboard. They let in light while giving a clear divide between old and new.

Another tactic is internal reworking:

  • Turn a formal dining room into a dual-use space
  • Knock through walls between smaller rooms (where allowed)
  • Use glazed doors or highlight windows to share natural light between spaces

We saw this done well in a Brunswick East home. The owners kept the 1930s frontage untouched but added a light-filled studio at the back. It used recycled timber and steel-framed windows. Now it’s their office, yoga room and guest space rolled into one.

For more stylish and functional home extension ideas for period properties, look to how others mix classic with clean modern lines.

Choosing Furniture That Doesn’t Clash

Let’s talk desks, chairs and shelves.

Modern office furniture often feels out of place in a heritage home. You don’t want plastic and chrome in a room with pressed tin ceilings. But you also need pieces that support work, not just style.

The trick is blending:

  • Use timber desks that echo the floorboards or trims
  • Add vintage or vintage-look lighting with LED bulbs
  • Pick soft, padded chairs in neutral tones or rich leather

Storage matters too. Avoid bulky filing cabinets. Try built-ins that match wall panels or tuck into old fireplaces. Use floating shelves instead of bookcases.

Keep cords and tech out of sight where possible. Wireless chargers, smart lights and Bluetooth speakers can all be hidden in plain sight.

Acoustics Matter in Period Rooms

One overlooked issue in older homes is sound. Hardwood floors, high ceilings and bare walls mean every sound bounces. That’s bad news on a video call or when recording content.

To fix this without ripping things apart, try:

  • Adding rugs and curtains (heavy linen or velvet work well)
  • Using acoustic panels behind art or inside bookshelves
  • Installing soft-close drawers and door hinges

In one Carlton terrace, the owner added recycled wool panels behind framed art. The room kept its style but sounded 10 times better. That made workdays easier and the space more versatile.

Heating, Cooling and Energy Use

Heritage homes are notorious for poor insulation. Summer turns them into ovens, winter makes them iceboxes. So if your office sits in one, you’ll need climate control.

A few energy-smart options:

  • Use reverse-cycle split systems (invisible from the street)
  • Install ceiling fans that match the decor
  • Add roof insulation and seal any draughts
  • Use plantation shutters or internal blinds that suit the window size and age

You can also upgrade glazing on existing windows, keeping the frames intact. This boosts comfort without hurting the look.

It’s not just about staying warm or cool—it’s about staying focused and productive.

Making It Multi-Use

The best home offices in period homes serve more than one role. You might work there from 9 to 5, but it could also become:

  • A library or reading nook
  • A craft space or studio
  • A guest room with a foldaway bed

To pull this off, pick flexible furniture. A deep desk that works as a sideboard. A filing cabinet that doubles as a coffee table. Shelves that hold work tools by day and books by night.

This helps justify the space and ensures it stays useful if your work situation changes.

Preserving Heritage Value While Adding Modern Utility

Some owners worry that updating their home might lower its value or upset the heritage feel. But the opposite is often true—when done well, adding a well-designed office or extension can raise both value and appeal.

Buyers want homes that are liveable. That includes working from home, entertaining, and relaxing. A good renovation makes the home more usable without making it unrecognisable.

And in a city like Melbourne, where many homes are over 100 years old, that mix of old and new is a big draw.

Case Study: Victorian Terrace in Fitzroy

One standout project took a two-bedroom Victorian terrace with zero natural light and turned it into a three-zone home with work, sleep and play areas.

The team kept the front intact. They converted the rear lean-to into an open-plan office, using recycled bricks and steel. Inside, they used dado rails and cornices to match old and new areas. It now has skylights, passive airflow, solar power and underfloor heating.

The home was featured in a major design magazine, and its value jumped by over $400,000 post-reno.

This proves you don’t have to sacrifice charm to gain convenience.

FAQs

  1. Can I build a home office in a listed heritage home without council approval?
    In most cases, internal work can be done without planning approval, especially if it doesn’t affect the building’s structure or external features. But external changes almost always need approval. Even small additions like skylights, rear extensions or new doors may need a heritage permit. It’s best to check with your local council before starting. You might also need a heritage architect or planner to write a supporting report. The good news is many councils are open to thoughtful updates—especially ones that preserve key features.
  2. How do I modernise a home office without ruining the heritage feel?
    Use the home’s best features as part of your design. Keep or restore original details like floorboards, fireplaces and trims. Add modern elements in a subtle way. That might mean using slimline steel-framed doors, soft lighting or built-in furniture that echoes old details. Stick to natural materials. And don’t fight the style—work with it. A modern home office in a Victorian or Federation home can look stunning if it feels intentional and balanced.
  3. What’s the best way to make a heritage home office energy-efficient?
    Start with insulation and sealing. Roof, floor and wall insulation makes a big difference. Draught-proof doors and windows. Use layered window treatments—curtains plus blinds work well. Consider upgrading to double glazing if it fits with your home’s look. Then bring in efficient heating and cooling, like split systems. LED lighting also helps reduce bills without ruining the vibe.
  4. How can I get more natural light into a dark period room?
    Several options exist. Skylights or light tubes are top choices if allowed. Internal glass doors or highlight windows between rooms can spread light around. Use pale paint colours on walls and ceilings to reflect light. Mirrors also bounce light well and can be styled to match the home’s age. Remove heavy furniture or blocky cabinets that absorb light. Rear extensions with big glass walls can help while leaving the front unchanged.
  5. What tech can I use in a heritage home office without it looking out of place?
    Wireless tools are your friend. Choose Bluetooth speakers, wireless charging pads and smart lighting that tucks into built-ins. Use under-desk cable trays or conduit that matches your wall colour. Smart blinds and climate systems can also be hidden. Look for retro-style or minimalist tech gear that blends in—think brass lamp USB ports or timber-trimmed speakers.

Time to Think Bigger

Heritage homes don’t have to stay stuck in time. With a little care, you can build an office that serves today’s needs and tomorrow’s changes. These spaces can keep their soul and gain new purpose.

If you’re ready to get started, or just want fresh ideas for your period property, take a look at Period Extensions & Designs. It’s your first step toward a smarter, more liveable heritage home.

Please call us today on (03) 8658 1340 or make an enquiry.

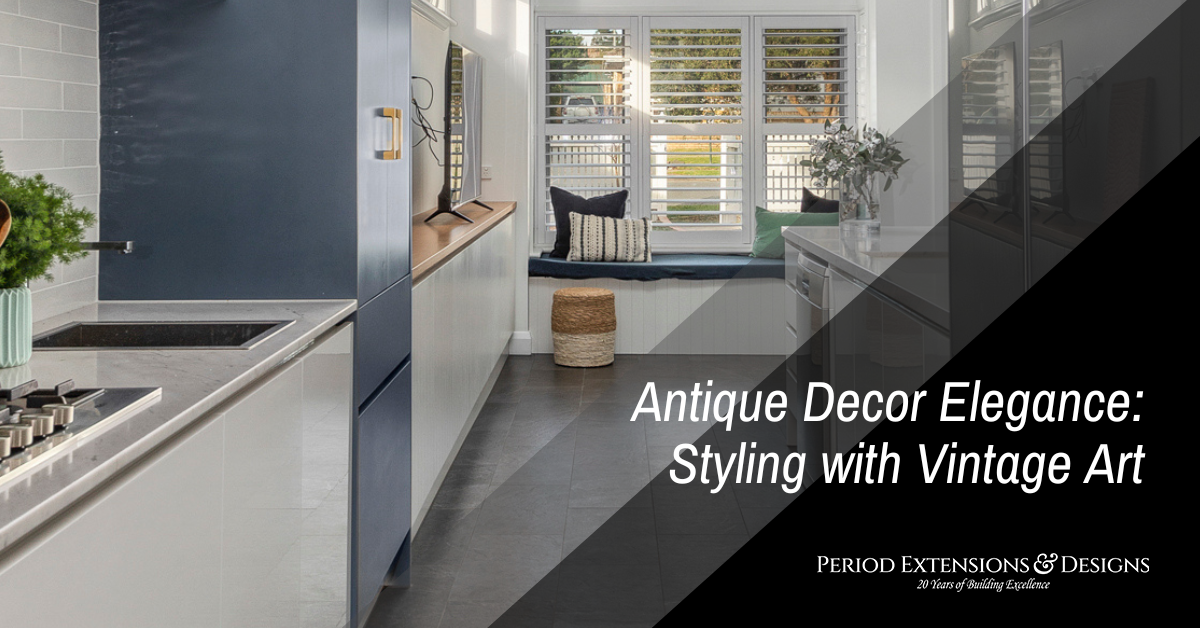
Gallery wall displaying a collection of antique paintings in gilded frames.
CategoriesPeriod Home Renovation

Antique Decor Elegance: Styling with Vintage Art

When it comes to timeless design, few things match the charm of vintage art in antique-inspired interiors. These pieces don’t just decorate walls. They bring stories, texture and history into the room. You don’t need a mansion or a heritage-listed house to embrace this look. Even the smallest flat can feel grand with the right touches. If you’ve ever admired the warmth of a classic setting, you’ll love what vintage art can do for your space.

That old-world feeling blends well with today’s love for slow living and conscious style. As more homeowners move away from fast furniture and throwaway trends, vintage art is making a strong comeback. It’s personal, sustainable and one-of-a-kind. And when paired with antique decor, the result feels lived-in but polished.

You might be starting a new project or just adding a few pieces here and there. Either way, bringing vintage art into your home is easier than you think. This guide walks you through the key ideas, current trends and what’s next in this growing space. Whether you’re renovating a federation-style home or adding flair to a modern build, it all starts with thoughtful choices.

And if you’re in the thick of home renovations in Melbourne, you’re in the perfect place to embrace this style and add a new layer of elegance to your interiors.

What Makes Vintage Art So Special?

Vintage art connects us to the past. Each piece carries a slice of time—a faded photo, a watercolour landscape, or an oil portrait with moody eyes. These aren’t just pretty pictures. They reflect who we are and what we value. And when styled well, they bring depth and soul into our homes.

There’s also a practical side. Vintage art is often better made. Frames are solid. Materials age well. You’re not buying off a factory line. You’re adding something with weight and history. It’s also sustainable. You’re reusing, not replacing. And you’re building a collection that feels authentic, not rushed.

Some pieces hold value over time. Others just spark joy or a conversation. That’s the beauty of it. You don’t have to be an art expert. You just have to know what speaks to you.

For those working on older homes, vintage art is the glue. It helps blend the old bones of the house with your current style. For newer homes, it adds a sense of history that softens the space.

To dive deeper into how these elements work together, check out these styling tips for decorating the interior of your period home.

Finding the Right Pieces for Your Space

You don’t need a big budget to get started. Local markets, online auctions and op shops are full of hidden gems. The key is to choose pieces that feel right. Trust your gut.

Here’s how to get started:

  • Look for original work or small runs: These have character and feel more unique.
  • Mix styles but keep a theme: You can blend art styles, but colour or subject should tie it all together.
  • Pick frames with care: The wrong frame can kill the vibe. Go for wood, brass or aged finishes that echo your furniture.

A good example? A client in Carlton had a small Edwardian home with high ceilings and detailed cornices. Instead of filling the walls with modern prints, she chose a mix of vintage botanicals, framed in soft gold, and oil paintings of European street scenes. The mix brought warmth without clashing with her modern sofa and coffee table.

If you’re struggling to balance different pieces, take a look at mixing traditional and modern furniture in period spaces for ideas.

Creating Impact with Gallery Walls

Gallery walls are back in a big way. But forget the Pinterest-perfect grids. The new take on this trend is relaxed, personal and layered.

Here’s what makes a good gallery wall:

  • Odd numbers: Go for three, five or seven pieces. It feels more natural.
  • Varied sizes: Mix large and small works for visual movement.
  • Common thread: Stick to a theme—maybe landscapes or family portraits—or just use similar colours.
  • Organic layout: Lay it out on the floor before hanging. Play around with spacing.

A family in Brunswick created a wall above their stairway using framed sketches, letters and even a few old maps. None matched. But all shared a sepia tone. The result? A walk-through history that felt alive.

By building on original details, you can enhance the character of your home through historic design choices.

Telling a Story Through Art

Every vintage piece has a past. You can use that to shape a mood or theme in the room. Maybe you’re drawn to coastal scenes. Maybe you love old portraiture. Whatever your thing, use it to weave a story.

You can build a room around:

  • A time period: Think Art Deco glamour or 1940s simplicity.
  • A mood: Calm, rustic, romantic, formal.
  • A location: French farmhouse, English library, Australian bush.

One Melbourne couple used vintage racing posters and black-and-white photos from the 1956 Olympics to build a nostalgic living room that echoed their family’s history in sport. That personal touch turned a regular lounge into a living archive.

Styling Tips for Different Rooms

Living Room:
This is where large pieces shine. Go bold with an oversized oil painting above the couch. Use smaller art on bookshelves or mixed in with mirrors and clocks.

Bedroom:
Soften the space with delicate sketches or muted landscapes. Choose calming colours and romantic themes. Hang pieces above the bed or on the wall near your dresser.

Kitchen:
Add charm with vintage food ads, handwritten recipes, or framed tea towels. These work best in small clusters or leaning on open shelves.

Hallways:
Perfect for narrow frames or vertical arrangements. Black-and-white family photos look great here, especially in matching wood frames.

Bathroom:
Go for small works that can handle steam. Botanical prints, pressed flowers, or maritime themes suit these spaces.

Mixing Old Art with New Spaces

One big challenge is making vintage art work in a modern or renovated home. The trick is balance.

Here’s what helps:

  • Contrast is good: A 19th-century sketch looks great on a clean white wall.
  • Keep furniture simple: Let the art shine. Don’t overcrowd the room.
  • Repeat key colours: Pull tones from the artwork into your rugs, cushions or throws.
  • Use lighting well: Vintage art often needs softer light. Think wall sconces or warm LEDs.

This style works beautifully in open-plan layouts where art helps define smaller zones. A homeowner in Fitzroy added two antique horse prints to their minimalist dining area. The mix felt both smart and grounded.

Restoring and Framing Old Art

Sometimes vintage art needs love. Don’t be afraid of minor damage. Faded colour or chipped paint can add charm. But for major issues, go to a pro.

Here’s what to know:

  • Glass matters: Use UV glass to protect paper-based works.
  • Backing counts: Acid-free matting keeps works safe.
  • Framing styles: Match the era or contrast with a sleek modern frame.

Many framers now specialise in vintage and antique pieces. Ask them to match the age and feel of the artwork without over-restoring it. You want the story, not a fake shine.

Where to Shop for Vintage Art in Australia

Looking to grow your collection? Australia has great places to source vintage art. Here are a few tips:

  • Local flea markets and antique fairs: Try Camberwell Market in Melbourne or Rozelle in Sydney.
  • Online: Look at Gumtree, eBay, or niche Aussie sites like The Vault Sydney.
  • Framing shops: Some sell restored pieces or prints with vintage appeal.
  • Estate sales and auctions: You’ll find real gems if you’re patient.

What’s Next for Vintage Style?

The future of vintage art is bright. As design leans more into sustainability and story-driven decor, vintage pieces will only grow in popularity.

Expect to see:

  • More blending: Vintage art in minimalist or brutalist spaces.
  • Digital discovery: Apps that scan and source vintage prints.
  • Heritage pride: A return to local stories, artists and Australian scenes.

The key takeaway? This style isn’t going anywhere. It’s flexible, honest and full of life.

Frequently Asked Questions

1) How do I choose the right vintage art for my home?
Start with what you love. Look for themes or styles that speak to you. Think about where it will go. The art should suit the room’s size and colour. Don’t stress about matching frames or perfect placement. Let it evolve. Over time, your collection will feel natural and personal.

2) Can vintage art work in a new build home?
Yes, and it can work well. The contrast adds interest. A sleek, modern space benefits from texture and depth. Use vintage art to warm up clean lines or to highlight zones in open-plan layouts. Stick to a loose theme and balance old with new pieces.

3) What’s the difference between vintage and antique art?
Vintage usually means 20 to 100 years old. Antique is over 100. But don’t get too caught up in labels. Focus on quality, condition and whether it fits your space. Vintage tends to be more affordable and available. Antique art often needs more care.

4) Is it okay to reframe old art?
Yes. Frames protect your art and help it suit your space. If the original frame is damaged or too ornate, swap it for something simpler. Just make sure it’s done right. Use acid-free materials and get UV glass if needed. A good framer will guide you through the options.

5) How do I keep vintage art looking its best?
Keep it out of direct sun. Use soft lighting. Clean frames gently. For paper-based works, use UV glass and keep them away from damp areas. Don’t hang above heaters. If a piece is valuable, consider having it appraised and insured.

Ready to Bring Timeless Style Into Your Home?

Antique decor isn’t about living in the past. It’s about building layers that last. Vintage art helps you do just that. It’s warm. It’s personal. It’s filled with character. Whether you’re restoring a classic home or shaping your first space, these pieces ground your style and tell your story.

Want help turning vision into reality? Visit Period Extensions & Designs and see how expert design can bring elegance to every corner of your home.

Please call us today on (03) 8658 1340 or make an enquiry.

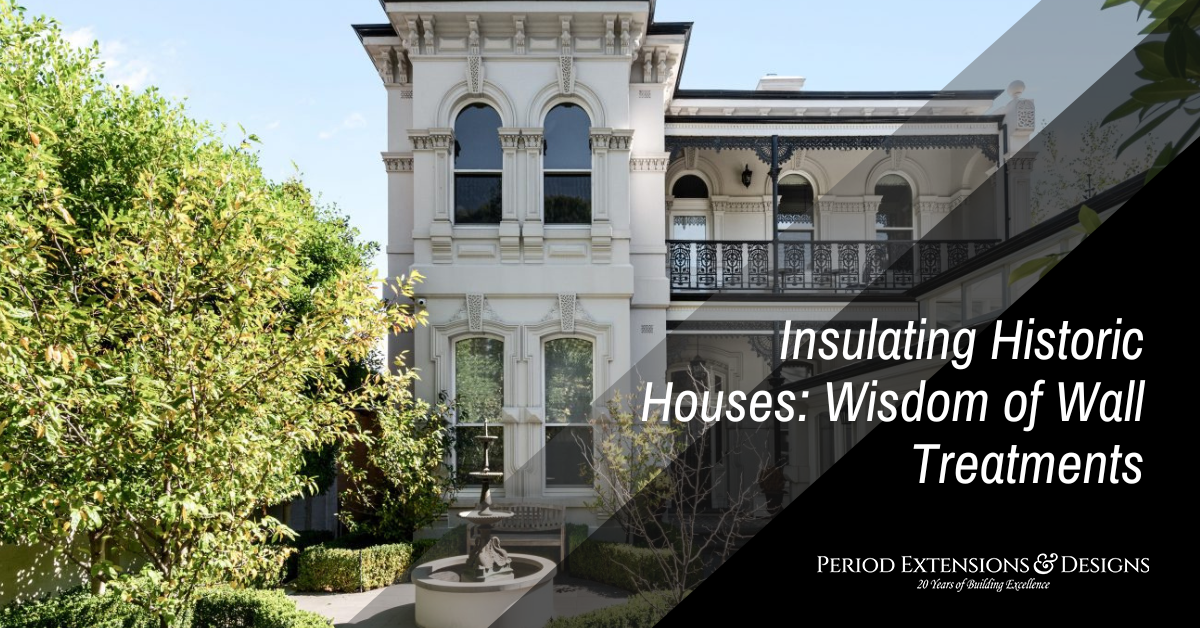
Internal wall insulation installed in heritage home to improve energy efficiency discreetly.
CategoriesPeriod Home Renovation

Insulating Historic Houses: Wisdom of Wall Treatments

Historic homes tell stories. Every crack, every cornice, every weathered wall holds history. But time brings change, and comfort expectations shift. Today’s families want heritage charm and year-round liveability. That’s where insulation steps in—quietly, carefully, and cleverly.

Insulating historic homes isn’t simple. You can’t slap on fibreglass batts and call it a day. These homes breathe. Their walls absorb moisture, shift with the seasons and need to remain true to their era. Thoughtful wall treatments can do more than improve comfort—they can protect history.

We’re diving deep into smart, sensitive wall insulation techniques that suit period properties. If you’re planning home renovations in Melbourne, this is your essential guide.

Understanding Traditional Wall Construction

Older homes weren’t built like today’s. Most period houses—Victorian, Edwardian, Federation—use solid brick or stone walls without any cavity. That means there’s no space for insulation. And if you do it wrong, you’ll trap moisture, crack walls, and even grow mould.

Traditional walls manage moisture naturally. They absorb and release water through the wall’s surface. That’s why adding non-breathable layers (like plastic or foil-backed insulation) often causes more harm than good.

To work with old walls, not against them, you need breathable insulation. These allow vapour to pass through slowly, without blocking airflow completely. Materials like wood fibre boards, lime plaster and hemp-lime are ideal. They support the wall’s original structure, maintain airflow and boost thermal comfort.

Improving your period home with energy-smart extensions also means respecting what’s already there. Don’t compromise the past chasing modern standards—blend them.

Why Wall Insulation is Worth the Effort

Insulating walls in older homes offers real wins:

  • Reduced energy bills: Less heat escapes in winter, less comes in during summer.
  • Better comfort: Fewer drafts, more stable temps.
  • Lower carbon footprint: Save on heating and cooling.

But it goes deeper than cost. Insulation preserves buildings. Fluctuating heat and moisture can damage walls, paint, plaster and even timber floors. By controlling these changes, insulation protects the home’s structure.

Modern insulation can match period features too. Breathable renders, slimline boards and hidden fixings let you insulate without ruining aesthetics. You don’t need to cover ornate cornices or original brickwork.

Case in point? A Federation-style home in Brunswick had cold, damp internal walls. By adding internal wood fibre boards finished with lime plaster, the owners boosted warmth and kept every decorative detail intact.

Restoring the character of your period home with thoughtful renovations often starts behind the walls.

Internal vs External Insulation: Weighing Your Options

There’s more than one way to insulate a wall. Internal insulation adds layers inside the home. External insulation adds them outside. Each has pros and cons.

Internal insulation works well if:

  • You want to keep the exterior look untouched.
  • You can afford to lose a few centimetres of space.
  • You’re redoing internal finishes anyway.

External insulation suits cases where:

  • The façade isn’t heritage-listed or decorative.
  • There’s room to extend the wall outwards.
  • You want to wrap the building fully for best results.

In heritage areas, councils often prefer internal methods. That keeps the street view unchanged. But internal insulation needs careful work. You must avoid gaps, thermal bridges and trapped moisture.

Hybrid systems can also work. That means insulating part inside, part outside—like adding external boards on back walls, and breathable plaster on internal feature walls.

Sustainable renovation options for period home insulation are growing. Look for natural materials, low-embodied carbon, and reversible systems where possible.

Choosing Breathable Wall Treatments

Let’s break down the top breathable solutions for period homes:

  1. Wood Fibre Boards
    These dense panels insulate and let vapour move. They’re often finished with breathable render. They also reduce sound and improve fire resistance.
  2. Hempcrete
    A mix of hemp shiv, lime and water. Applied as a wall coating or block. It stores carbon, insulates well, and supports moisture movement.
  3. Lime Plaster on Laths
    Traditional method. Add timber laths to walls, then coat in lime plaster. Not high R-value but improves comfort and breathability.
  4. Insulating Lime Render
    Used on internal or external walls. Made with natural aggregates for added insulation.

Each has different thickness, performance and cost. But they all suit the way old homes work.

Avoiding Common Mistakes in Heritage Insulation

Here’s what not to do when insulating old walls:

  • Don’t seal walls completely: Moisture needs to escape.
  • Avoid synthetic, foil-backed boards: These block vapour.
  • Don’t insulate damp walls: Always fix water issues first.
  • Don’t ignore thermal bridges: Gaps around floors, windows, and joists let heat out.

Instead, start with a moisture survey. Check for rising damp, leaks, or condensation issues. Next, design a whole-house approach. Walls, roofs, floors and windows all affect performance.

And always test small areas first. Materials behave differently depending on age, site and build method.

Heritage-Approved Materials: What to Look For

Most councils require that heritage homes use sympathetic materials. That means breathable, natural and non-toxic options. Here’s a few approved by heritage bodies:

  • Lime-based products: Plaster, render, mortar.
  • Natural insulation: Hemp, sheep’s wool, wood fibre.
  • Mineral boards: Calcium silicate or perlite-based for high moisture zones.

Look for certifications like:

  • GreenTag
  • BREEM ratings
  • Heritage Council approvals

These help you meet building codes without risking the property’s status. They also prove your upgrades are safe, lasting and low-impact.

Thermal Improvements Without Compromising Aesthetics

One of the biggest fears? Losing character. That’s fair. Nobody wants to hide original brickwork behind polystyrene panels.

Here’s how to keep the charm:

  • Use slim insulation boards in tight spaces.
  • Highlight original features (cornices, mouldings) by insulating around them.
  • Match render and plaster styles to existing finishes.
  • Keep some feature walls exposed, and insulate less visible areas instead.

Smart design can make insulation near invisible. Skilled tradespeople can install systems without touching ceiling roses, skirting boards or pressed metal panels.

It’s not all or nothing. Every improvement helps.

Climate Control That Respects History

Australia’s weather is harsh—hot summers, cold winters, big humidity shifts. Old homes weren’t built for this. But insulation helps regulate internal temps.

Thermal mass (like solid brick walls) can store heat, but only if you manage moisture. That’s why breathable insulation matters more in heritage homes than new builds.

Passive heating and cooling works best with well-insulated walls. Add solar gains, good window shading and airtightness upgrades, and you’ll get big comfort gains with low energy input.

Insulated walls also cut noise—a bonus in busy suburbs or urban spots.

Planning and Approvals for Wall Upgrades

Before touching a single wall, check with your local heritage or planning office. Most upgrades inside the home are easier to approve. But you still need to show:

  • Materials match the home’s style.
  • No major visual change will occur.
  • Upgrades are reversible if needed.

Hire a designer or architect familiar with heritage homes. They’ll help plan around regulations, submit drawings, and manage the project.

Many councils now encourage sustainability in heritage buildings. But you need to follow process.

FAQs

  1. Can I insulate a heritage home without damaging the walls?
    Yes, if you use breathable materials. Heritage walls need to “breathe”—that means moisture must pass through slowly, not get trapped. Materials like wood fibre, hemp-lime or breathable plaster work best. Avoid plastic sheets or foil-backed boards. Always inspect for damp first. Fix leaks or rising damp before installing anything. Once the walls are dry, you can add insulation inside without affecting the home’s exterior. Use lime-based plaster or insulating boards that match original textures. Done right, insulation can improve comfort without harming walls.
  2. How much space will internal wall insulation take up?
    It depends on the material. Slim systems like aerogel or thin wood fibre boards can be under 40mm thick, including finish. Thicker systems like hempcrete can add 100mm or more. In small rooms, that can affect furniture layout or doorway widths. But clever design helps. You can insulate only the coldest walls, leave decorative walls exposed or recess built-in furniture to save space. The warmth gained often outweighs the slight space loss. Plus, you’ll cut heating costs long-term.
  3. Will I need council approval for insulating walls?
    If the property is heritage-listed, yes—especially if changes affect the look of the home. Internal works might not need a permit, but it’s best to check. Councils want to protect original materials and features. Provide details on materials, finishes and reversibility. Using traditional methods and keeping original features exposed helps get approval. Work with a heritage specialist. They know what gets through planning and what gets knocked back. Better safe than sorry.
  4. Can I DIY insulation in a period home?
    Not recommended for walls. Insulating historic walls needs care. You must understand how moisture moves, how materials interact and how to avoid cold bridges. Small mistakes can cause big problems—like mould or cracked plaster. You can DIY simple draught-proofing or roof insulation. But for walls, hire a pro with heritage experience. They’ll test for damp, plan the right system, and install it correctly. Some government rebates also require professional installers.
  5. What insulation is best for solid brick homes in Australia?
    Breathable insulation is best. That includes:
  • Wood fibre boards with lime plaster
  • Hempcrete applied in layers
  • Calcium silicate boards for high moisture spots
  • Lime render with insulation beads for external use

These let moisture move and keep walls dry. In hot areas, reflective coatings might help too—but not on their own. Combine them with internal insulation for best results. Each home needs a tailored plan. Climate, budget, wall type and style all matter.

Where Past Meets Present: Making Smart Moves Today

Insulating heritage walls isn’t about quick fixes. It’s about long-term care. Done right, it gives comfort, saves energy and protects old homes for future generations.

Treat every wall with respect. Think before drilling. Choose materials with history in mind. Don’t just copy what works in new builds—old homes deserve better. If you’re ready to take the next step, visit Period Extensions & Designs to explore smarter, safer ways to upgrade your period home.

Please call us today at Period Extensions & Designs on (03) 8658 1340 or make an enquiry.

Bay window with cushioned seating in a heritage home's reading nook.
CategoriesPeriod Home Renovation

Efficient Lighting: Brightening Your Heritage Home

Heritage homes are packed with charm, character, and craftsmanship that modern builds often lack. But keeping that timeless look while updating lighting? That’s where things can get tricky. Old homes weren’t built for modern lights or today’s energy needs. So, if you’re tackling home renovations in Melbourne, you’ll want to get the lighting just right—efficient, stylish, and sympathetic to the original design.

Whether you’re fixing up a Victorian terrace, an Edwardian cottage, or a Federation-style house, this guide will walk you through how to light your heritage home smartly. It covers all you need—ideas, examples, and practical tips—to keep your place glowing without compromising its soul.

Understand the Bones of Your Home

Every heritage home tells a story. Before making changes, you need to understand the structure and original lighting intent. Old homes often have high ceilings, thick walls, and small windows. Natural light may be limited, especially in internal rooms.

Check ceiling roses, cornices, and wall textures. These features frame how light plays across the room. You don’t want to stick a modern pendant in the middle of a ceiling rose meant for a chandelier.

Then there’s wiring. Old electrical systems might not handle LED setups or smart lighting. You may need a full rewire or at least an upgrade. An electrician with experience in older homes can help you avoid damage while ensuring safety and code compliance.

From there, think about your lighting needs—task, ambient, accent, and decorative. Each type plays a role and works best when layered together.

Respecting Style While Updating Light Fixtures

Lighting in heritage homes isn’t just about brightness—it’s part of the decor. Original fixtures like art deco sconces or brass pendant lights often become focal points. Replacing them outright can feel like a loss, but there’s a middle ground.

You can retrofit classic fixtures with efficient LED bulbs. These use less power and last longer. Some globes even mimic the warm glow of old incandescent bulbs.

If original fittings are broken, look for vintage-style replicas. Many Australian suppliers now offer energy-efficient options that echo classic looks. You can also get custom-made fittings that blend past aesthetics with modern tech.

For example, a couple renovating a 1920s bungalow in Fitzroy used replica gaslights converted to LED. They gave the home a soft glow that matched its period charm but slashed the power bill. When planning designing a period bathroom with optimal lighting, soft wall lights and ceiling diffusers create a luxe mood without overpowering the space.

Maximising Natural Light First

Before installing any lights, ask this: are you using natural light well? Many heritage homes have untapped potential. A few tweaks can make a massive difference.

Open up heavy curtains and replace dark shutters with lighter treatments. Use mirrors to bounce daylight deeper into rooms. Choose light wall colours that reflect sunlight instead of soaking it up.

Skylights or sun tunnels can also help. They let light into darker areas like hallways or bathrooms. Modern models have built-in diffusers that spread light softly and evenly.

A home in Northcote used a series of discrete skylights in its kitchen and living area. The owners said it transformed their daily routine, making the space feel larger and more alive. If you’re serious about maximising space and light in period homes, natural lighting should always be step one.

Layering Lights for Function and Warmth

One ceiling light won’t cut it—especially in homes with high ceilings. You need layers.

  • Ambient lighting sets the tone. Use central ceiling fixtures or multiple pendants with dimmers.
  • Task lighting helps you see clearly. Think reading lamps, kitchen bench lights, or bathroom vanity strips.
  • Accent lighting highlights features like fireplaces, artwork, or pressed metal ceilings.
  • Decorative lighting adds flair. This includes chandeliers, wall sconces, or vintage lamps.

Layering also helps reduce shadows and avoids that cold, clinical vibe some LED setups bring. Use dimmable options so you can adjust based on time of day or activity.

In one lighting project inspired by period home renovations, a couple installed a layered system in their formal lounge—wall sconces for mood, a central pendant for reading, and uplights to highlight ornate plasterwork. The result was warm, elegant, and energy smart.

Energy Efficiency Without Compromise

Heritage charm doesn’t have to mean sky-high energy bills. LEDs are your best friend. They use up to 80% less energy than halogen bulbs and last 10 times longer.

Choose bulbs with a warm white (2700K–3000K) colour temperature. These mimic traditional globes and won’t look out of place. Pay attention to lumens (brightness) instead of watts.

Use motion sensors or timers in hallways, pantries, or outside. Smart switches let you control lighting from your phone and set schedules, all without adding visible tech to your walls.

Also, consider solar-powered garden lights. They’re subtle and effective—perfect for showcasing old brickwork or a heritage fence at night.

Smart Lighting That Blends In

Smart homes aren’t just for new builds. You can integrate smart lighting into old homes without turning them into tech labs.

Use smart bulbs in old fittings. These give you remote control, dimming, and colour change without rewiring. Choose systems like Philips Hue or LIFX, which don’t need a hub and work over Wi-Fi.

Smart switches are great too. Some models look just like classic toggles but come packed with automation features.

In a Federation home in Camberwell, owners used vintage-style switches that connected to a smart lighting grid. They could schedule their porch lights, dim living room lighting for movie nights, and even switch off everything with one button before bed.

Keep the tech hidden and your home keeps its old-school soul.

Outdoor Lighting for Safety and Style

Don’t forget the exterior. Path lights, porch lighting, and garden uplights not only boost safety—they make your home look magical at night.

Use low-voltage LED systems or solar lights. These save energy and require less wiring. Stick to warm white tones to match traditional facades.

Feature lighting can highlight trees, original stonework, or stained glass windows. Wall-mounted lanterns work well for front entries. Make sure the style suits your era—think cast iron for Victorian homes or curved brass for Art Deco.

When lighting outdoor heritage spaces, keep it soft. Too much brightness will wash out details and create glare.

Lighting for Hallways and Stairwells

These parts often get overlooked. But in heritage homes, they can feel dark and narrow. Fixing this helps safety and makes transitions between rooms feel more seamless.

Use wall sconces or picture lights along hallways. Install LED strip lighting under stair treads for subtle safety. You could also hang a pendant or chandelier in stairwells to create drama and function.

One couple in Elsternwick used vintage coach lights spaced along their main hallway. Paired with a central art deco pendant, it gave the space rhythm and style. Subtle updates like this bring life to forgotten corners.

Choosing the Right Electrician

Not every sparkie is trained to handle heritage jobs. Choose one with proven experience in period homes. Ask for photos, reviews, and referrals.

A good electrician will:

  • Respect the existing structure and finishes
  • Know how to retrofit lighting with minimal disruption
  • Offer energy-smart solutions without ugly add-ons

If they rush or suggest cutting into features without care, keep looking.

Heritage homes deserve tradespeople who treat them with respect. It’s worth the extra time to find the right one.

Frequently Asked Questions

1) Can I use LED lights in old fixtures without rewiring?
Yes, in most cases. LED bulbs now come in standard bayonet and screw bases, so they fit into old sockets. Just check the fixture’s condition and wattage limit. If it’s an antique fitting, have it inspected by an electrician first. Some older fixtures may need rewiring to ensure safety. Use dimmable LEDs for extra control, and choose warm white to keep that vintage feel.

2) What’s the best lighting layout for a heritage kitchen?
Start with layered lighting. Use a ceiling pendant or flush-mount for general light. Add task lights—like under-cabinet strips—for prepping food. If you have a dining area, consider a chandelier or hanging light above the table. Choose fittings that match your home’s style. Think enamel shades or antique brass. Dimmers help shift the mood from dinner prep to casual meals. Always include ventilation and safety checks for lighting above stoves.

3) How can I improve bathroom lighting in a period home?
Mix function with style. Wall sconces beside or above mirrors give great task light. Add a central pendant or flush light for general use. If space allows, include natural light with frosted windows or a skylight. Use LED options with a high CRI (colour rendering index) to ensure true skin tones. Look into vintage-look fittings with modern internals when designing a period bathroom with optimal lighting. Always ensure fittings are moisture-rated.

4) Are there ways to keep heritage light switches but make them smart?
Yes, you can! Some companies make retrofit switch modules that sit behind your existing switch plate. You keep the look but gain smart control. Other smart switches come in old-style designs—toggle or rotary—but link to apps and automation systems. Installation does need a qualified electrician. It’s a great option if you want convenience without giving up style.

5) Will lighting upgrades damage my heritage home’s value?
Not if done right. In fact, good lighting can boost value. It highlights features, adds comfort, and shows the home’s best side. The key is subtle integration. Don’t rip out original fixtures unless you must. Instead, upgrade wiring behind the scenes and use period-appropriate fittings. Efficient lighting also lowers running costs, which buyers appreciate. With care, upgrades can enhance both form and function.

Keep the Glow Alive in Every Room

Efficient lighting isn’t just about saving energy. It’s about letting your heritage home shine. The right setup adds comfort, beauty, and value. It brings out what makes your space special and makes it more liveable every day.

Think about natural light first. Respect the old bones. Add layers of smart, efficient light that work behind the scenes. With the right team, plan, and mindset, your home can glow brighter than ever—without losing its soul.

If you’re ready to light up your period home the right way, check out the expert team at Period Extensions & Designs. We know how to bring out the best in old homes with skill, care, and heart.

Please call us today at Period Extensions & Designs on (03) 8658 1340 or make an enquiry.
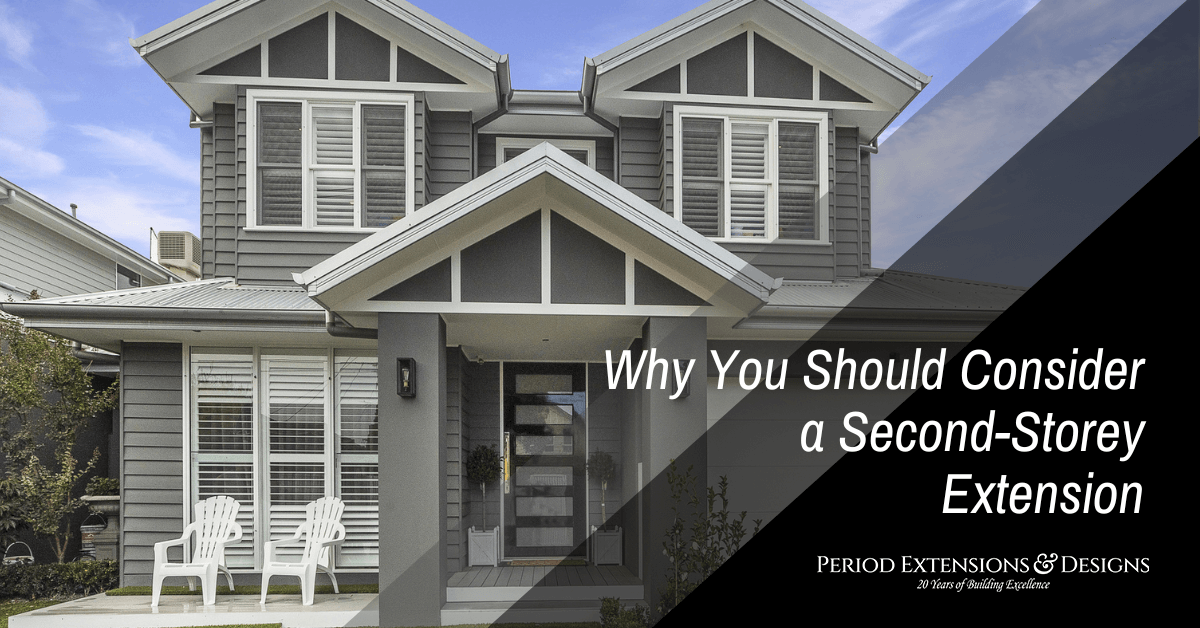
"Skylight introducing natural light into a traditional living room.
CategoriesPeriod Home Renovation

Custom Windows: Choosing Styles Suitable for Period Homes

The charm of a period home lies in its history. However, keeping that charm intact while updating parts of the house, like the windows, takes thought and care. You can’t just stick in any old window and call it a day. Period homes need window styles that match their character. If done right, custom windows don’t just look good—they also boost energy use and comfort.

That’s where things get interesting. You’re not limited to copying what was there before. With the right approach, you can combine tradition with smart modern upgrades. Whether you’re mid-reno or just planning your dream design, this guide will help you make choices that suit both your home’s past and its future.

This is especially helpful if you’re planning home renovations in Melbourne. You want windows that fit your home’s style and meet today’s standards too.

Understanding the Architecture of Your Period Home

Each era had its own look and feel. Victorian homes, for example, often had tall sash windows with fine detailing. Edwardian homes might lean toward bigger panes and simpler trims. Federation houses love stained glass and decorative timber. If you ignore these details, new windows can feel out of place.

So before choosing a window style, learn what makes your home’s architecture unique. Look at:

  • The shape and size of original windows
  • The type of glass used (clear, frosted, coloured)
  • Frame materials and paint colours
  • Positioning of windows on the façade

Getting these details right means the new windows won’t stick out like a sore thumb. They’ll look like they’ve always belonged. This is key when restoring the exterior of a period home.

Matching Window Types to Architectural Styles

Here’s where we dig into what works best for specific home styles.

Victorian Homes
Think tall, slim sash windows with detailed mouldings. These windows often have small panes, timber frames and ornate architraves. Stick with vertical sliding sashes and avoid wide panes—they just don’t suit the era.

Edwardian & Federation Homes
These homes like larger windows with casement styles or even leadlight details. Timber is still king, but designs start to open up. You might see bay windows, grouped casements or fixed windows paired with stained glass panels. Keep the window proportions consistent with the original ones.

California Bungalows
These prefer chunky window frames, often grouped casement windows or double-hung sashes. The timber frames tend to be broader, and the windows are usually set within deep reveals.

When choosing window types, ask yourself: “Would this style have existed when my house was built?” If not, it may throw off the balance. Getting the details right will improve the exterior appearance of your period home and even raise its value.

Balancing Heritage Looks with Modern Performance

Old windows look good but they often don’t perform well. They can be draughty, hard to open or let in too much noise. Custom windows let you keep the heritage style but bring in better function.

Some ways to strike this balance:

  • Double glazing hidden inside traditional-looking sashes
  • Timber-alternative frames that mimic wood but need less upkeep
  • Slimline aluminium for rear-facing windows where looks matter less

Take a Federation home in Carlton. The owners replaced old single-glazed casements with timber-framed double-glazed replicas. The look stayed true, but their heating bills dropped sharply. That’s smart design in action.

Check with your local council before replacing windows. Many heritage areas have strict rules. Getting it right the first time avoids stress later. You’ll also benefit from how glazing creates more light with an extension, which opens up older homes in clever ways.

Custom Window Materials: Pros and Cons

You’ve got a few choices when it comes to materials, and each one brings its own benefits and drawbacks.

Timber

  • Pros: Looks authentic, easy to paint, suits all period homes
  • Cons: Needs upkeep, can swell or crack
  • Best for: Front-facing windows and high-detail areas

Aluminium (timber-look finishes available)

  • Pros: Low maintenance, durable, works for back extensions
  • Cons: Can look too modern if not done right
  • Best for: Secondary areas or modern additions

uPVC

  • Pros: Energy efficient, weather resistant
  • Cons: Often doesn’t suit heritage style
  • Best for: Hidden windows or energy upgrades with tight budgets

When choosing material, focus on the parts of the house where it matters most. The front of the home usually needs full heritage detail. Out the back, you can loosen up a bit.

Window Colours That Work with Period Styles

Colour plays a big role in how a window blends with your home. Period homes often used muted or earthy tones, nothing too bold or shiny.

Here’s a rough guide:

  • Victorian: Deep greens, browns, blacks
  • Edwardian: Soft creams, whites, muted blues
  • Federation: Classic green and cream combos
  • Bungalows: Earth tones—greys, dark reds, olive greens

It’s best to match window colours to other features like fascia, gutters or fences. This keeps everything looking tied together. Avoid glossy finishes—they rarely suit period exteriors.

Energy Efficiency Without Compromising Character

Older homes aren’t known for keeping the heat in or the noise out. But modern window technology has come a long way.

Here’s how you can boost performance:

  • Use low-e glass to reduce heat transferChoose argón-filled double glazing for sound and heat control
  • Install window seals and weather strips to stop draughts
  • Go for double-hung sashes with spring balances to reduce rattling

Even better, these upgrades often don’t change how the windows look. You get a comfortable, quiet home with the charm still intact.

Practical Tips for Getting Custom Windows Made

Ordering custom windows takes time and planning. Here are a few practical tips:

  1. Work with a builder or designer who knows heritage rules
  2. Get precise measurements—don’t guess or round up
  3. Ask for samples of frame profiles and glass types
  4. Check lead times—some windows can take 6–12 weeks
  5. Keep communication open with your supplier

One Melbourne couple renovating their 1920s bungalow ordered custom timber windows but forgot to check the reveal depth. When they arrived, they stuck out too far and had to be redone. Don’t skip the details.

Planning Permissions and Heritage Overlays

Many period homes sit in heritage overlay zones. That means changes, especially to the exterior, may need council approval.

Before changing any window, check:

  • Is your home in a heritage area?
  • Does the council require like-for-like replacements?
  • Will visible parts need a heritage permit?

Good planning avoids last-minute headaches. Some councils even have heritage advisors who can guide you. If needed, get drawings done to show how the new windows will look compared to the originals.

Modern Touches That Don’t Ruin the Look

It is possible to include a modern edge without clashing with the past.

Here’s how:

  • Add clear glazing to rear windows for light, but keep leadlight on the front
  • Use pivot or tilt windows in hidden spots where function matters more
  • Include motorised openers in skylights or high windows—no ropes needed
  • Choose low-profile flyscreens that can be removed easily

These tricks give you convenience while keeping the historic charm. It’s the best of both worlds.

FAQs

1) Can I replace old windows in a heritage home without council approval?
It depends on your location. In most heritage overlay zones, any visible change to the exterior—including windows—needs approval. If you’re replacing a window exactly as it was (same material, design, size), you may not need a full permit, but it’s still wise to check. Councils vary in how strict they are. Some allow rear or side changes without approval, while others may want full drawings or a heritage assessment. Always call your local planning office before making plans.

2) What’s the best window style for my Edwardian home?
Edwardian homes suit larger casement windows, often grouped in twos or threes. Stained glass features are also common, either as a top pane or side panel. You’ll want timber frames in muted tones like white, cream or soft green. Double-hung windows can also work, but they need to have a thicker frame and traditional detailing. The goal is to keep the windows in scale with the rest of the house—big, open and symmetrical.

3) Are timber-look aluminium windows acceptable for period homes?
They can be, but only in the right spots. Timber-look aluminium works well on back extensions or side areas not visible from the street. These windows offer low maintenance and better durability. But for the front façade, especially in stricter heritage zones, stick with real timber. Many councils won’t approve aluminium on front-facing windows if the home originally had timber frames. If you do use aluminium, choose a finish that closely mimics painted wood.

4) How can I make old-style windows more energy efficient?
You can add efficiency without changing the whole look. Retrofit double glazing is a smart option. It fits into existing timber frames and adds an extra layer of glass. Weather seals, heavy curtains and pelmets also help keep warm air in. Another good upgrade is low-e glass, which reduces UV and heat transfer. Adding internal blinds between double-glazed panes gives extra insulation too, and doesn’t mess with the appearance.

5) What’s the average cost of custom heritage-style windows?
Costs vary based on material, size, glass type and detail. As a rough guide, a single custom timber sash window might cost between $1,200 to $2,500 installed. Add leadlight, double glazing or special trims, and that number goes up. Bulk orders can sometimes lower the per-window cost. If you’re doing a full house, budget $15,000–$30,000 depending on scope and complexity. Always factor in extras like permits, scaffolding and paint touch-ups.

Preserve the Past, Build for the Future

Choosing the right custom windows is more than picking glass and frames. It’s about keeping the soul of your home alive while upgrading how it works. A smart window plan blends beauty, function and compliance. And when done right, it adds real value.

Whether you’re fixing up the front of your Victorian or planning a new wing on your Edwardian gem, custom windows make a difference. They let you bring in the light, improve comfort and keep your home’s story going strong.

To explore more expert guidance or start planning your own renovation, get in touch with Period Extensions and Designs. Let your windows speak your home’s history—loud and clear.

Please call us today at Period Extensions & Designs on (03) 8658 1340 or make an enquiry.
Energy-efficient lighting illuminating ornate architectural details.
CategoriesPeriod Home Renovation

Integrating Modern Amenities in Heritage Homes

The demand for home extensions in Melbourne has surged as homeowners seek to enjoy both heritage charm and contemporary living. It’s no longer enough to have a home that simply looks beautiful — it must function for modern life. Integrating modern amenities into heritage homes presents a unique challenge: how do you honour the character of the past without sacrificing comfort, efficiency and technology?

Respecting the Past While Living in the Present

Heritage homes often hold sentimental and architectural value. These homes tell stories through stained glass, ornate cornices, high ceilings and handmade finishes. But while they look stunning, many don’t meet today’s expectations for convenience or lifestyle.

So, what’s the solution? We adapt. We update. But most importantly, we respect. Blending new features into old homes needs thoughtful planning. You want the house to look and feel cohesive. That’s where design thinking, material choices and expert trades make all the difference.

An important question to ask early on is: Are modern extensions suitable for period-style homes? The answer is yes — if done right. With the right approach, a modern kitchen, sleek bathroom or open-plan living space can sit beautifully beside classic features.

Smart Design That Speaks to Both Worlds

Design isn’t just about how something looks. It’s also about how it works. When integrating modern amenities, the design must fit the rhythm of the house. That means following existing lines, echoing shapes and keeping scale in check.

One way to achieve this is through transitional spaces. Think of a glass walkway connecting an old brick home to a new pavilion. It visually separates the two styles while linking them functionally. Skylights, floor-to-ceiling windows and internal courtyards are also popular. They let in light and give the older parts of the house a sense of breath.

If you’re still wondering how design bridges tradition and innovation, check out these tips for mixing modern and traditional furniture. Design harmony often starts with smaller pieces that help soften the contrast between eras.

Energy Efficiency Without Changing the Soul

Old homes were not built for energy efficiency. Draughty windows, uninsulated walls and high ceilings can make heating and cooling costly. But that doesn’t mean you need to tear everything out.

There are sustainable options for updating your period home that work with its existing structure. You can insulate walls internally, upgrade windows with double glazing while keeping original frames, and use solar panels in less visible locations like the rear roof. Hydronic heating, underfloor systems and energy-efficient appliances also help reduce your carbon footprint without changing the look of the house.

One standout project in Sydney involved retrofitting a 1920s Federation home. The team retained its ornate ceilings and original fireplaces but added hydronic heating under restored timber floors. The result? A home that stayed warm in winter but kept its character.

Integrating Smart Home Technology

Tech belongs in every home — even old ones. But you don’t want screens, wires or flashing lights ruining the vibe of your heritage house. That’s where subtle integration matters.

Use wireless systems where possible. Wi-Fi enabled lights, thermostats and security cameras can be controlled through your phone. Mount speakers in ceilings or behind furniture. Place charging stations in hidden drawers. And choose switches and interfaces that blend with your colour palette.

For example, one Melbourne couple renovated their Victorian terrace by installing a smart lighting system that mimicked the old gaslight patterns in their hallway. It was a nod to history but run by an app on their phone.

Key tech options for heritage homes:

  • Voice-controlled smart lighting
  • Keyless entry that works with vintage door handles
  • Remote-controlled blinds for hard-to-reach windows
  • Discreet wall-mounted tablets or screens in cabinetry

This mix lets you enjoy convenience without compromise.

Kitchens and Bathrooms: The Modern Must-Haves

These two rooms are where the most change usually happens. You need modern plumbing, appliances and fixtures, but you also want the style to work with the rest of the home.

One trick is to use materials that echo the period’s feel — like marble, timber and brushed brass — but shape them in a contemporary way. Another tip is to work with the room’s existing structure. Keep fireplaces where possible. Use open shelves with period brackets. Or add a freestanding bath beneath a restored window.

For example, in a Queenslander home outside Brisbane, the owners restored the original pine floorboards and used them as the kitchen base. They added new white cabinetry with shaker-style doors and a soft grey splashback. The result was a space that looked modern but felt like it belonged.

Creating Seamless Transitions Between Old and New

One of the hardest parts of mixing modern with heritage is getting the flow right. You don’t want people to walk through the house and feel like they’ve entered a different world each time they turn a corner.

The trick? Repetition and restraint.

Use recurring colours, textures and lines. Repeat cornices or skirting sizes, match timber stains or paint tones. Keep materials consistent. And don’t overcrowd the home with features. Let it breathe.

You can also use light to create unity. Lighting design is often overlooked, but it’s key to setting mood and balance across the home. Try pendant lights in both the old and new parts, or continue a downlight pattern across both zones.

Another approach is to treat the old part of the house as the ‘formal’ zone — sitting rooms, studies — and make the new part casual — open-plan living, kitchen, family space. It’s a natural way to divide usage and design styles.

Working with Heritage Restrictions and Councils

Not all homes are created equal in the eyes of the law. Some properties carry heritage overlays or protections that limit what you can change. These rules are there to protect the character of suburbs and streetscapes, but they can create roadblocks.

Before making any changes, you’ll need to consult local planning schemes and perhaps hire a heritage consultant. They can guide you through what’s allowed, what’s not and how to get approvals.

Important things to check:

  • External changes like new windows or materials
  • Roofline alterations
  • Colour changes to visible facades
  • Demolition of internal walls
  • Garden or fence modifications

Work with professionals who understand both heritage and council processes. They’ll help you get the outcome you want — without drama.

Choosing the Right Professionals

A project like this isn’t just about builders. You’ll need the right mix of experts to pull it off. This could include architects, interior designers, builders who specialise in period homes and heritage advisors.

Look for teams who can show you past projects. Ask for references. And most importantly, make sure they listen to your vision. The best outcomes happen when everyone is working toward the same goal — preserving history while adding comfort.

It’s also helpful to work with tradespeople familiar with old materials and methods. Some may know how to restore stained glass or work with lime mortar, while others can replicate ornate plasterwork.

Choosing the right team isn’t just about skill. It’s about passion for what they do.

Cost vs. Value: What’s the ROI?

Let’s talk numbers. Updating a heritage home isn’t cheap. But it doesn’t have to break the bank if you plan smart. More importantly, the return on investment can be strong — especially in tightly held suburbs where charm and character boost value.

Buyers often pay more for a home that blends the best of both worlds. It feels timeless but works for today. You’re also preserving the property’s long-term value by protecting what makes it special.

Where costs go:

  • Structural updates (like foundations or roofs)
  • Plumbing and electrical rewiring
  • Joinery and custom fittings
  • Council applications and consultant fees

Don’t skimp on the basics. Get your structure and services right first. Then layer in the luxury.

FAQs

1) How do I know if my house is considered a heritage property?
Your local council can tell you. In Australia, heritage properties are listed either by state or council heritage registers. Some homes fall under heritage overlays, which protect the streetscape and certain elements. Others are individually listed. If your home is older than 50 years and features original architectural detail, it’s worth checking before starting renovations. A heritage consultant can help interpret the rules and your options.

2) Can I add a second storey to a heritage home?
Yes, but with caution. Councils often restrict visible changes to rooflines and front facades. A second storey may need to be set back, hidden behind the original structure or designed to blend with the roof pitch. Working with a heritage architect increases your chances of approval. Designs should be sympathetic, not identical. This way, the home evolves while the heritage elements remain respected.

3) Is it possible to achieve energy efficiency in a heritage home without major renovations?
Absolutely. You can start with simple upgrades: draft-proofing windows and doors, adding insulation in accessible areas like roofs, and switching to LED lighting. Next, look at smart controls for heating and cooling, which reduce energy waste. For bigger gains, double-glazing windows or installing solar panels helps, especially when done discreetly. It’s about combining low-impact changes with smart tech to create lasting benefits.

4) How do I modernise a heritage home without losing its character?
Start by understanding what makes the house special — whether it’s the cornices, fireplace, floorboards or facade. Then make design choices that support those features. Avoid copying the old style in the new parts. Instead, go for contrast done with care. Use matching materials, neutral colours and consistent detailing. Consult with professionals who know period homes. A well-balanced renovation feels like a natural extension of history.

5) How long do heritage renovations usually take?
That depends on the scope. Small upgrades like painting or updating fittings may take weeks. Full renovations, especially with council approvals or structural changes, can take several months or more. Expect longer timelines for custom joinery or heritage-specific materials. Add extra time for permit approvals or unexpected discoveries (like outdated wiring or termite damage). Plan well and stay flexible — the results are worth it.

Your Future, Rooted in History

Bringing modern life into a heritage home isn’t just about upgrades. It’s about storytelling. These homes have stood for decades — some even over a century. They’ve seen lives pass through, generations grow and cities transform.

When you modernise them with care, you keep that story alive. You add your chapter while preserving the ones before. That’s powerful.

So, if you’re ready to bring comfort and style into your period home, now’s the time to start. Connect with passionate experts who care about history as much as you do. Visit 

Please call us today at Period Extensions & Designs on (03) 8658 1340 or make an enquiry.
Custom wardrobe seamlessly integrated into classic wall panelling.
CategoriesPeriod Home Renovation

Discover the Charm of Hidden Storage: Space Solutions in Period Homes

Old homes have soul. They tell stories through timber floors, ornate ceilings, and vintage fixtures. But charm often comes with trade-offs, especially when it comes to space. Period homes weren’t designed for modern storage needs. That’s where clever hidden storage steps in—not just as a space-saver, but as a design feature that preserves your home’s heritage.

Homeowners are leaning into subtle, seamless solutions that give them room to breathe without losing character. If you’re planning home extensions in Melbourne, or thinking about ways to optimise your current layout, hidden storage is one of the smartest upgrades you can make.

Let’s explore how you can reclaim space while staying true to your home’s timeless appeal.

Built-In Storage with a Historical Twist

The best hidden storage doesn’t shout. It blends in. In period homes, that means drawing from the existing style—whether it’s Victorian, Federation, or Edwardian—and adding function where it fits best.

You can:

  • Build cupboards into alcoves beside fireplaces
  • Add bench seating with lift-up lids under bay windows
  • Install shallow cabinets in thick plaster walls

Each one becomes part of the architecture. For example, a Federation-era home in Brighton had zero hallway storage. The owners built in floor-to-ceiling panelling that looked like original wainscoting but opened up to reveal coat hooks and broom space. It was invisible until you opened it. No space wasted. No character lost.

If you’re thinking about new additions, these smart extension ideas for optimising your period home include clever ways to make storage a design feature.

Under-Stair Magic

That awkward triangle under the stairs is prime real estate. Many older homes waste it entirely. But with some smart joinery, it becomes a storage jackpot.

You can:

  • Fit drawers for shoes, bags or pantry overflow
  • Install cubbies or open shelving for books or baskets
  • Build a pull-out cabinet with hooks for jackets

A couple in Camberwell turned their unused under-stair area into a wine cellar with timber cladding to match the stair’s original balustrade. It doubled as a talking point and a practical addition.

What makes under-stair storage shine is the ability to fully customise it without affecting structural elements. It’s a great spot to experiment with finishes, whether you want to go rustic or polished.

Want to make your period home stand out with practical design tips? Don’t overlook this goldmine of a space.

Wall Niches: Storage with Style

In period homes, walls often have depth—either from thick render or because of chimneys and structural layers. This opens the door to recessed storage.

Wall niches:

  • Create clean lines with zero protrusion
  • Are perfect for bathrooms, hallways and kitchens
  • Can feature timber shelves or decorative mouldings

A popular choice is creating niches between wall studs. These can be framed with skirting and cornice details that echo the home’s style. One inner-north homeowner added niches beside their fireplace to hold books and candles, making the room feel rich without adding furniture.

You don’t need huge renovations either. Even a shallow 10cm shelf can be handy and beautiful when built into the wall. This kind of detail gives your home character without adding clutter.

Disguised Storage Furniture

Furniture can work harder. In period homes, where floorspace matters, multi-use pieces are key.

Think about:

  • Window seats with storage under the cushion
  • Ottomans or trunks that double as coffee tables
  • Beds with drawers built into the frame

Custom furniture means you control every detail. In a Prahran bungalow, a couple had a cabinetmaker build a storage banquette along their dining nook. It matched the home’s panelled walls and held table linens and board games. The kids thought it was just a bench.

These pieces aren’t just useful—they add charm. When built to match existing trim or window frames, they look like they’ve always been there.

Looking for creative ways to gain space in your home? Let your furniture carry more weight.

Attic Access Without the Eyesore

Old homes often have underused roof cavities. With thoughtful design, the attic becomes more than a cobwebbed dumping ground.

Hidden attic storage:

  • Uses pull-down ladders or trapdoors
  • Can include lined, floored zones for easy access
  • Keeps bulky items out of sight

A young family in Kew used theirs for holiday gear, seasonal clothes, and heirloom furniture. A built-in hatch in the ceiling, styled to match their pressed-metal details, meant it stayed completely discreet.

You can even create attic drawers tucked into eaves for linen or books. These work best in upper-storey extensions where ceiling angles create dead zones.

Storage in the roof? Smart. Hidden? Even smarter.

Sliding Wall Panels

Think of sliding panels as secret doors—but for your storage. They slide aside, not out, which keeps walkways clear and walls tidy.

Popular in:

  • Hallways (concealing shelves or cupboards)
  • Kitchens (hiding pantries or appliance garages)
  • Bathrooms (for storing towels behind mirrors or boards)

In Fitzroy, a terrace renovation included wall panels made from timber salvaged during demolition. One wall slid open to reveal a home office station—desk, drawers, and power points all tucked away.

This approach is clean and clever. It also protects valuable floor space and keeps things minimal.

Secret Doors and Panels

Some storage needs to be truly hidden. Whether for safety or style, secret panels can add a touch of drama while serving a real function.

You can build:

  • Bookshelves that swing open to reveal a closet
  • Mirror panels that hide makeup storage
  • Timber panelling that covers linen cupboards

An antique collector in Hawthorn added a flush panel in his study. It looked like part of the wall but opened to reveal a safe and file cabinet. No handles. No clues.

These kinds of solutions require precision and quality craftsmanship. But when done well, they become part of the story.

Kickboard Storage in Kitchens and Bathrooms

That space under cabinets—the kickboard—usually sits empty. But it doesn’t have to.

Pull-out kickboard drawers:

  • Add shallow storage for small items
  • Are great for pet bowls, trays, or cleaning products
  • Work best in custom cabinetry setups

They’re invisible when closed. Just a push or tap and out they slide. In small homes, every inch counts. And in kitchens where heritage design limits overhead storage, they’re a smart alternative.

One apartment in St Kilda used them for flat baking trays and extra cutlery. The owner said it changed the way she used her kitchen—clean, calm, everything tucked away.

Integrated Bathroom Storage

Period bathrooms are often tight. Clawfoot tubs look stunning, but they don’t leave much room. That’s why integrated bathroom storage matters.

Think about:

  • Mirror cabinets recessed into walls
  • Vanities with deep drawers, not shallow cupboards
  • Shaving cabinets disguised as wall panels

You can also build niches into shower walls for soap and bottles. They save space and avoid cluttered corners.

An East Melbourne project added floor-to-ceiling panelling behind the bath. It opened to reveal hidden shelving and even a built-in laundry chute. Seamless, safe from moisture, and full of function.

Hidden storage in bathrooms keeps the vibe clean and luxurious—even in older layouts.

Frequently Asked Questions

1) How do I add hidden storage without damaging heritage features?
Start by identifying non-original areas like plasterboard walls or later extensions. Focus your storage upgrades there. Use custom joinery that mimics original trims, skirting, or cornices to help it blend. Avoid touching structural timber or decorative ceilings. Always use reversible methods when possible so you can undo changes later without damaging original materials. A good cabinetmaker familiar with heritage homes can guide you through safe, stylish options.

2) What are the best rooms to add hidden storage in a period home?
Kitchens, hallways, bathrooms, and bedrooms offer the best opportunities. Kitchens can use toe-kick drawers and recessed pantries. Hallways can hold narrow cupboards disguised as wall panelling. Bathrooms benefit from recessed mirror cabinets and in-wall storage niches. Bedrooms work well with beds that include drawers or window seats with hidden chests underneath. Start with the most cluttered areas, then work room by room.

3) Can hidden storage increase property value?
Yes, especially in urban areas where space is tight. Buyers love clever storage, but it has to be well-designed and subtle. Hidden storage that matches the home’s style can boost appeal. Built-in furniture adds usable space without eating up the floor plan. It’s not just a renovation trend—it’s a smart investment. Well-integrated solutions make the home feel bigger and more luxurious, which can increase buyer interest and perceived value.

4) What materials should I use for hidden storage in older homes?
Match your materials to the home’s original palette. Use solid timber, timber veneer, or painted MDF with period-style trims. Avoid glossy laminates or modern plastics that stand out too much. If you’re matching existing joinery, bring in a sample to get the colour and finish right. Recycled or reclaimed materials work well too, especially when you want to keep the patina consistent. Hardware should also suit—choose brass, iron, or antique finishes.

5) Is it worth hiring a professional for hidden storage design?
Definitely, especially in period homes. These projects need precision and respect for the original structure. A professional understands load-bearing elements, style consistency, and spatial balance. They’ll design storage that works with your home, not against it. Plus, they’ll handle tricky details like concealed hinges, flush panels, and cavity depths. It’s the difference between a clever idea and a flawless result.

Bring Charm and Function Together

Hidden storage is more than a trend. It’s a smart, respectful way to live better in the homes we love most. With the right ideas and skilled hands, you can turn unused nooks into beautiful, seamless storage. You get room to move, and your home keeps its soul.

Whether you’re dreaming of a full renovation or just want a few clever tweaks, there’s never been a better time to rethink your space. Thoughtful storage transforms how a home feels—calmer, cleaner, and more usable. If you’re looking to restore charm while making your home more livable, get in touch with us now.

Please call us today at Period Extensions & Designs on (03) 8658 1340 or make an enquiry.

Restored fireplaces adding warmth and historical charm to period homes.
CategoriesPeriod Home Renovation

Rekindling History: The Warmth of Restored Fireplaces

Nothing brings warmth and character to a home like a fireplace. Once the heart of the household, fireplaces provide heat, cooked meals, and gathered families together. Many older homes still have them, though some have been covered up, replaced, or left unused. But restoring an original fireplace does more than revive an architectural feature—it reconnects the home with its past.

Whether you’re undertaking home renovations in Melbourne or simply looking to enhance your living space, a restored fireplace adds undeniable charm. Beyond aesthetics, it also boosts property value, improves heating efficiency, and honours the craftsmanship of the past. Let’s explore why fireplaces deserve a second life and how they can transform your home.

1. The Appeal of Restored Fireplaces

Old fireplaces hold stories. The soot-stained bricks, ornate cast iron surrounds, and intricate tilework speak of another era. Restoring these features keeps history alive and brings a sense of warmth, both literally and figuratively, back into the home.

A well-preserved fireplace:

  • Enhances the character of a period home
  • Creates a striking focal point in a room
  • Increases property value and buyer appeal

Homeowners today seek authenticity. While modern gas heaters and electric fireplaces offer convenience, they lack the soul of an original wood-burning hearth. Restoring a fireplace is a nod to tradition, craftsmanship, and the beauty of raw materials.

For those inspired by romantic renovation ideas for Victorian and Edwardian homes, bringing a fireplace back to life can be a defining feature of the restoration.

2. Restoring Fireplaces: Key Steps and Considerations

Restoration isn’t as simple as removing an old cover and lighting a fire. It requires care, expertise, and often professional input. Key factors to consider include:

Assessing the Condition

Before restoration begins, a thorough inspection is necessary. A fireplace might look intact but could have structural issues, a blocked flue, or damaged brickwork. An expert assessment ensures safety and longevity.

Cleaning and Repairing

Decades of soot and neglect can leave fireplaces in poor condition. Cleaning methods include:

  • Brick and stone restoration to remove grime
  • Tile and cast iron polishing for aesthetic appeal
  • Chimney sweeping to clear blockages

Choosing the Right Fuel

Restored fireplaces can burn wood, gas, or bioethanol. Wood-burning fireplaces provide a classic experience but require maintenance. Gas fireplaces offer convenience, while bioethanol options provide an eco-friendly alternative.

For homeowners looking for inspiring renovation ideas for period homes, the choice of fireplace style and fuel type should complement the home’s character.

3. The Energy Efficiency of Traditional Fireplaces

Restored fireplaces are not just decorative. With the right updates, they can improve energy efficiency and heating performance.

Upgrading for Efficiency

Older fireplaces often lose heat through the chimney. Solutions include:

  • Installing a fireplace insert to retain warmth
  • Adding a chimney balloon to reduce draughts
  • Sealing gaps in brickwork to improve insulation

Sustainable Fuel Choices

Many homeowners now opt for eco-friendly solutions. Sustainable wood sources and high-efficiency inserts reduce emissions while maintaining the charm of a real fire.

Fireplace restoration doesn’t just bring warmth; it enhances comfort while reducing energy waste. Those passionate about preserving original features in Victorian homes in Melbourne often find that a well-maintained fireplace balances history with practicality.

Frequently Asked Questions

1) How much does it cost to restore a fireplace?

The cost of restoring a fireplace depends on several factors, including its current condition, the extent of repairs needed, and the materials involved. A basic restoration, such as cleaning soot buildup, repairing minor cracks, and repainting a cast iron insert, may cost between $500 and $1,500. However, if the fireplace has significant structural issues—such as a damaged chimney, missing bricks, or a collapsed hearth—restoration can cost anywhere from $2,000 to $5,000 or more.

Additional expenses may include installing a flue liner for better safety, updating the hearth for modern compliance, or converting a wood-burning fireplace to gas or bioethanol. Custom restoration, especially for period homes, can be more expensive due to specialised craftsmanship. Before starting the project, it’s best to consult a professional who can assess the condition of the fireplace and provide an accurate quote. Proper restoration not only improves aesthetics but also enhances functionality and increases property value.

2) Can I use my old fireplace after restoration?

Yes, but before using a restored fireplace, it’s crucial to ensure it meets modern safety standards. Over time, fireplaces can develop structural issues, such as cracked flue liners, blocked chimneys, or weakened masonry, which can create fire hazards or poor ventilation. Before lighting a fire, a professional chimney sweep or fireplace specialist should inspect the structure for any necessary repairs.

If the chimney is blocked or in poor condition, relining it with a modern flue can improve efficiency and safety. If you prefer to avoid wood-burning options, you might consider installing a gas or bioethanol insert, which provides a cleaner, low-maintenance alternative while preserving the fireplace’s aesthetic. Additionally, checking local regulations regarding wood-burning fireplaces is important, as some areas have restrictions to reduce emissions.

By restoring and maintaining your fireplace properly, you can enjoy the warmth and charm of a traditional hearth while ensuring it remains a safe and functional feature in your home.

3) What are the best fuels for a restored fireplace?

The best fuel for your restored fireplace depends on factors like efficiency, maintenance, environmental impact, and the type of ambiance you want. For a traditional experience, hardwoods like ironbark, red gum, or oak are ideal. These dense woods burn longer, produce more heat, and create the classic crackling sound of a real fire. However, they also require regular cleaning and proper chimney maintenance.

If you prefer a low-maintenance option, gas fireplaces provide consistent heat without the hassle of wood storage or ash cleanup. They are easy to ignite, can be controlled remotely, and are highly efficient. Bioethanol fireplaces offer another modern alternative. These burn cleanly, don’t require a chimney, and produce minimal emissions, making them a great choice for eco-conscious homeowners.

Ultimately, the best fuel choice depends on your priorities. If authenticity and ambiance matter most, wood is the way to go. If convenience and efficiency are your focus, gas or bioethanol might be better suited to your needs.

4) Will restoring a fireplace increase my home’s value?

Yes, restoring a fireplace can significantly increase your home’s value, particularly in period homes where original features are highly sought after. Buyers appreciate restored fireplaces because they add character, warmth, and a unique architectural element that modern heating solutions cannot replicate. A functional fireplace is often a selling point, especially in colder climates where alternative heating sources are desirable.

In addition to aesthetics, a well-maintained fireplace can improve energy efficiency. Wood-burning fireplaces with inserts retain heat better, while gas and bioethanol options provide warmth with lower emissions. Potential buyers see these as attractive features that enhance both comfort and sustainability.

Real estate experts note that homes with restored fireplaces tend to attract more interest and sometimes sell for higher prices. Even if you’re not planning to sell, restoring a fireplace can enhance your daily living experience while preserving an important part of your home’s history.

5) How do I maintain a restored fireplace?

Maintaining a restored fireplace is essential for both safety and longevity. Regular upkeep prevents damage, ensures efficient operation, and keeps the fireplace looking its best. The most important step is scheduling annual chimney inspections and cleanings, especially if you have a wood-burning fireplace. Soot and creosote buildup can create fire hazards, so professional sweeping is necessary.

For gas fireplaces, servicing by a technician ensures proper functionality, while bioethanol fireplaces require occasional cleaning of the burner to prevent residue buildup. If you have a wood-burning fireplace, always use dry, seasoned wood to reduce smoke and creosote accumulation.

Checking for cracks or loose mortar in the brickwork is also important. Even minor damage can lead to bigger structural issues if left unchecked. Cleaning the fireplace surround and hearth with appropriate materials (such as a mild detergent for tiles or cast iron polish for metal) will help preserve its original charm. Regular maintenance ensures your restored fireplace remains a safe and beautiful feature for years to come.

Bring History Back to Life with a Restored Fireplace

A fireplace isn’t just a heat source—it’s a connection to the past. Whether restoring an ornate Victorian hearth or updating a simple Edwardian design, bringing an old fireplace back to life adds beauty, warmth, and value.

For homeowners looking to honour history while enhancing comfort, fireplace restoration is a rewarding project. If you’re planning renovations, consider restoring your home’s fireplace as part of a broader transformation. 

Please call us today at Period Extensions & Designs on (03) 8658 1340 or make an enquiry.
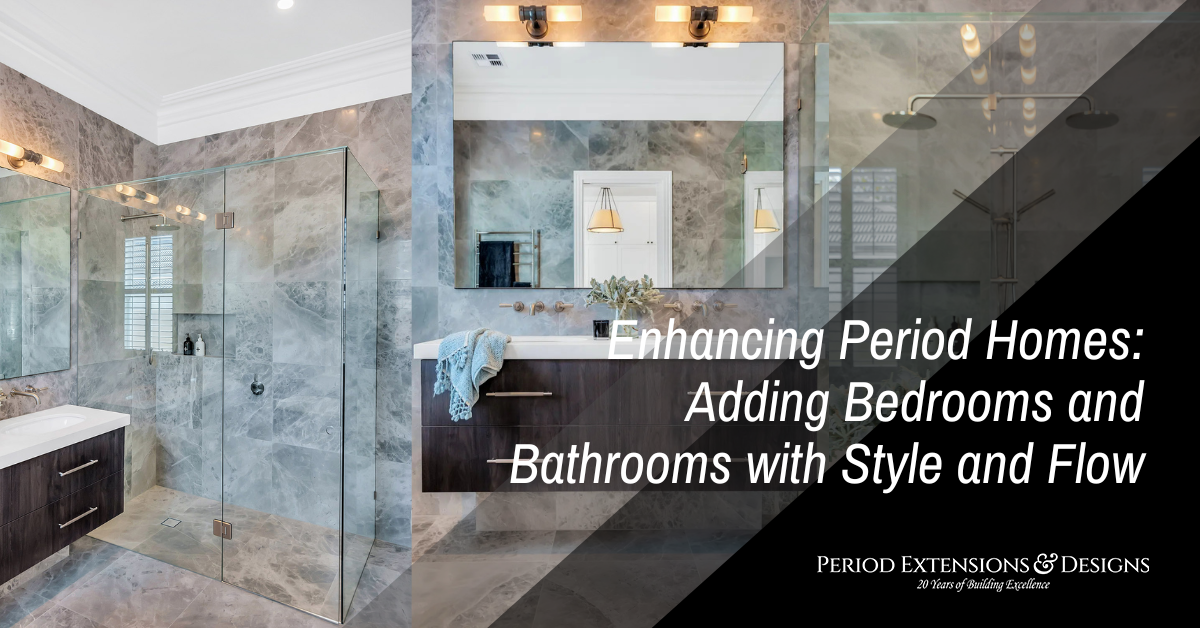
Autumn renovations for Melbourne heritage homes.
CategoriesPeriod Home Renovation

How to Create a Cosy Autumn Retreat in Your Heritage Home

Autumn in Melbourne brings crisp air, golden leaves and a desire to stay indoors. For owners of heritage homes, this season is perfect for renovations that make spaces warm and inviting. With the right design choices, you can transform your period home into a cosy retreat. Whether you’re updating interiors or enhancing curb appeal, home renovations in Melbourne offer endless possibilities.

Preserve Character While Adding Warmth

Heritage homes in Melbourne have charm. Decorative cornices, stained glass windows and timber floors are timeless. But these elements need thoughtful updates to blend history with comfort.

To add warmth, consider restoring original features like fireplaces. An open fireplace not only heats your space but also adds a cosy focal point. Install soft lighting to highlight period details and create a relaxed mood. Adding rich textures like wool rugs or velvet cushions enhances comfort.

For exteriors, a fresh coat of paint in warm hues like terracotta or deep green can improve the exterior appearance of your period home for a warm, inviting look. Pair this with traditional lantern-style lighting for an autumn glow.

Choose Warm Colour Palettes for Interiors

Colours play a big role in creating a cosy atmosphere. Autumn calls for earthy tones like burnt orange, mustard yellow, deep red and warm browns. These shades make spaces feel snug and inviting.

Painting walls in neutral shades like beige or taupe creates a soft background. Add colour through accessories like throws, cushions and curtains. Wood furniture in darker tones also adds warmth.

For kitchens and bathrooms, brass or copper fittings add a vintage charm that complements the season. If you’re unsure where to start, explore period home interior design tips to create a cosy atmosphere.

Upgrade Heating Systems for Comfort

Melbourne’s autumn can be chilly, so heating is essential. Heritage homes often have outdated systems that don’t heat efficiently. Upgrading to modern systems ensures your home stays warm while saving energy.

Underfloor heating is a great choice, especially for homes with timber floors. It provides even warmth and doesn’t affect the home’s aesthetics. Modern gas fireplaces are another option. They offer the charm of an open fire without the maintenance.

Draught-proofing is also important. Seal gaps around doors and windows to keep warmth in. Heavy curtains add an extra layer of insulation.

Incorporate Natural Materials for a Rustic Touch

Natural materials add a rustic charm perfect for autumn. Wood, stone and leather bring warmth and texture. Use reclaimed timber for feature walls or shelving. Stone countertops or sinks in bathrooms add a timeless feel.

Leather armchairs or sofas offer comfort and style. Add knitted throws and linen cushions for a layered look. Rattan light fixtures or wicker baskets complete the autumn aesthetic.

Flooring is another key area. Polished timber floors are beautiful but can feel cold. Add rugs made from natural fibres like wool or jute to soften the space and add warmth.

Maximise Natural Light and Views

Autumn light is soft and golden, making it perfect for cosy interiors. Maximise natural light by cleaning windows and using sheer curtains. Place mirrors opposite windows to reflect light and make rooms feel brighter.

If your heritage home has large windows, make the most of them. Arrange seating to face outdoor views, letting you enjoy autumn colours from inside. Glass doors leading to gardens also enhance the connection between indoors and outdoors.

Skylights are a great addition if you’re planning renovations. They bring in natural light without altering the home’s façade.

Modernise the Kitchen with a Warm Touch

The kitchen is often the heart of the home, especially during autumn when cooking warm meals becomes a joy. Modernising a heritage kitchen without losing its charm requires balance.

Install timber cabinetry with classic panel designs. Choose warm-toned stone benchtops like granite or marble. Open shelving with vintage-style brackets can display autumn essentials like copper pots or ceramic bowls.

For flooring, terracotta tiles add warmth and durability. Pendant lights in brass or bronze finish complete the cosy look.

Transform Bedrooms into Cosy Havens

Bedrooms should feel like a retreat, especially in cooler months. Start with soft, warm bedding in materials like flannel or linen. Add layers with wool blankets and plush cushions.

Choose warm-toned lighting like bedside lamps with amber bulbs. Heavy curtains in rich fabrics block out cold drafts. If space allows, add a reading nook with a comfy chair and soft lighting.

Period details like high ceilings or decorative mouldings can be enhanced with simple touches. A vintage rug, antique bedside tables or a classic headboard tie the room together.

Renovate Outdoor Spaces for Autumn Evenings

Outdoor spaces often get overlooked in autumn, but they can be transformed into cosy spots for evening relaxation.

Add a fire pit to your garden or courtyard. Surround it with comfortable seating and warm blankets. Install outdoor lighting like lanterns or fairy lights for a soft glow.

Timber decking with outdoor rugs and cushions creates an inviting space. A covered pergola with climbing plants adds charm and provides shelter.

Outdoor kitchens or BBQ areas can also be upgraded. Add built-in seating with weatherproof cushions for comfort.

Future Trends in Heritage Home Renovations

Home renovations in Melbourne are evolving. As more people embrace sustainable living, heritage homes are being upgraded with eco-friendly features. Solar panels, energy-efficient windows and water-saving fixtures are becoming standard.

Smart home technology is also on the rise. Automated lighting, heating and security systems are being integrated into period homes without affecting their charm.

Open-plan living is another trend. While heritage homes often have separate rooms, many owners are removing walls to create open spaces that feel modern yet timeless.

There’s also growing interest in biophilic design, which connects interiors to nature. Large windows, indoor plants and natural materials are key elements being added to heritage homes.

Practical Tips for Renovating Your Heritage Home

Renovating a heritage home comes with challenges, but careful planning ensures success. Here are practical tips:

  • Understand regulations: Heritage homes in Melbourne have restrictions on renovations. Check with local councils before starting any work.
  • Hire specialists: Work with architects and builders experienced in heritage renovations. They understand the unique needs of period homes.
  • Budget wisely: Heritage renovations can be costly. Prioritise essential work like structural repairs or heating upgrades first.
  • Preserve original features: Restore rather than replace. Keep elements like ceiling roses, fireplaces and timber floors intact.
  • Blend old with new: Add modern conveniences without compromising character. Choose fixtures and fittings that complement the home’s style.

FAQs

1) What are the most popular renovations for heritage homes in Melbourne?
Popular renovations include kitchen and bathroom upgrades, restoring fireplaces, updating heating systems, and improving outdoor spaces. Adding natural materials and warm colour palettes is also common.

2) How do I maintain the character of my heritage home during renovations?
Preserve original features like decorative mouldings, timber floors and stained glass. Use traditional materials and designs when adding new elements. Work with specialists who understand heritage homes.

3) Are there restrictions when renovating heritage homes in Melbourne?
Yes, many heritage homes are subject to regulations that protect their historical value. Check with your local council for specific guidelines before starting renovations.

4) How can I make my heritage home more energy-efficient?
Upgrade to energy-efficient windows, add insulation, and install modern heating systems. Solar panels and water-saving fixtures also help reduce energy use.

5) What’s the cost of renovating a heritage home in Melbourne?
Costs vary depending on the scope of work. Structural repairs, preserving original features and high-quality materials can increase expenses. Plan your budget carefully and prioritise essential work first.

Bring Warmth and Charm to Your Heritage Home This Autumn

Renovating your heritage home in Melbourne can transform it into a cosy autumn retreat. By blending original charm with modern comforts, you create a space that’s warm, inviting and timeless. As trends move towards sustainability and smart technology, there are endless possibilities to enhance your period home. For expert help with home renovations in Melbourne, visit Period Extensions & Designs. Let’s bring your vision to life with thoughtful, beautiful design.

Please call us today at Period Extensions & Designs on (03) 8658 1340 or make an enquiry.
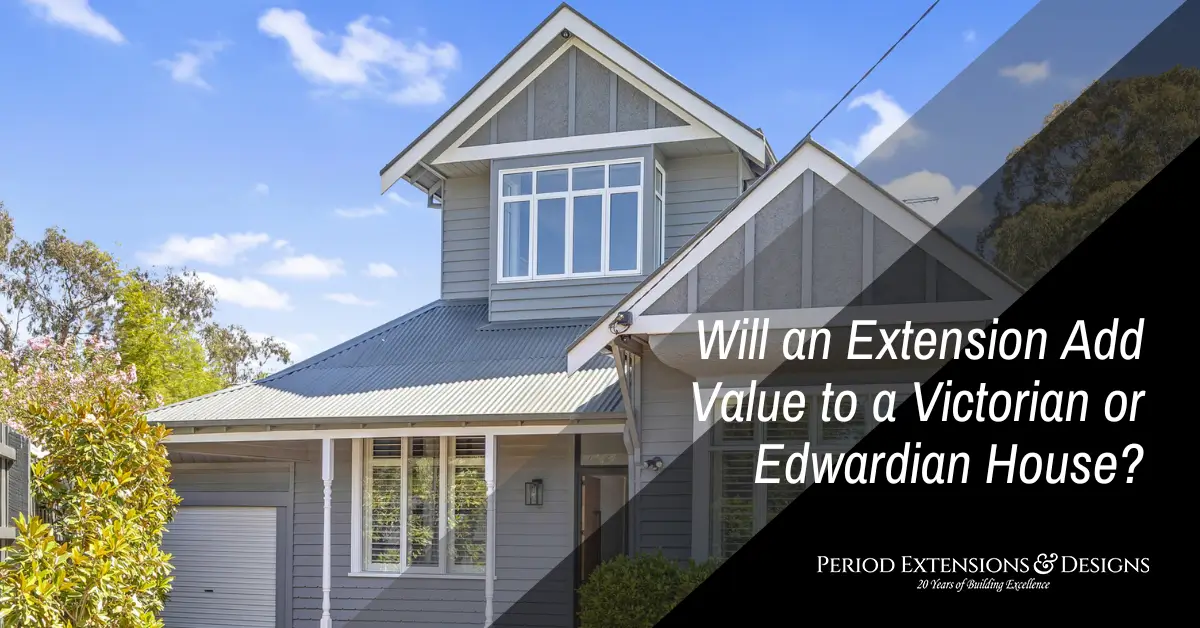
Period home in Melbourne prepared for autumn.
CategoriesHome Extensions Period Home Renovation

Preparing Your Period Home for Melbourne’s Autumn Weather

Autumn in Melbourne brings a mix of golden hues, crisp mornings, and sudden rain showers. While the season has its charm, it also comes with challenges for homeowners, especially those with period homes. The architectural beauty of period homes often hides vulnerabilities, making house renovation in Melbourne or careful seasonal maintenance a necessity.

Whether you’re looking to make simple improvements or planning major changes with the help of home renovators in Melbourne, autumn preparation is the ideal time to get started. This season is a great opportunity to tackle maintenance tasks, fortify your home against the weather, and keep your property comfortable and charming.

In this guide, we’ll explore how to prepare a period home for autumn with practical tips that cover everything from structural maintenance to aesthetic updates. You’ll learn the importance of Victorian home autumn updates, heritage home weatherproofing, and more. Let’s make your home autumn-ready!

Why Does Autumn Prep Matter for Period Homes?

Period homes are full of history and elegance, but they also require specific care to stand the test of time. The shift in weather during Melbourne’s autumn months brings cooler days, wetter conditions, and plenty of falling leaves. Without preparation, these changes can cause significant wear and tear on older properties.

Unique Challenges for Period Homes in Autumn

The construction of period homes often includes traditional materials like timber, slate, and brick, which can be sensitive to moisture and temperature fluctuations. Here’s what your home might face:

  • Leaks in the roof: Worn or missing tiles let water seep in, damaging interiors and structural elements.
  • Drafty windows and doors: Poor insulation makes it hard to keep the warmth in and the cold out.
  • Clogged gutters: Autumn leaves block water flow, leading to overflows that can damage walls and foundations.
  • Rot and decay in timber: Moisture can weaken wood, affecting verandas, window frames, and trims.

With proper seasonal home renovations, you can protect your home and preserve its unique character.

How to Prepare Your Period Home for Autumn

Start with a Roof Inspection

Your roof is your home’s primary barrier against the elements. Even minor damage can cause big problems, especially during Melbourne’s unpredictable autumn rains. Take these steps to ensure your roof is ready:

  1. Look for missing, cracked, or loose tiles.
  2. Inspect flashing around chimneys and skylights for gaps or damage.
  3. Clear away moss and lichen, which can trap moisture and weaken your roof.

If you notice significant issues, don’t delay repairs. This is where professionals in Melbourne autumn weather prep can make a difference.

Keep Gutters and Downpipes Clear

Autumn leaves are beautiful but notorious for clogging gutters. Blockages can cause water to pool and overflow, leading to damage that’s expensive to fix. Here’s how to stay on top of it:

  • Remove leaves and debris by hand or using a gutter-cleaning tool.
  • Rinse gutters with a garden hose to ensure water flows freely.
  • Check downpipes for blockages and clear them if necessary.

Cleaning your gutters regularly is a simple yet essential part of home care autumn Melbourne.

Weatherproof Windows and Doors

Drafts don’t just make your home cold; they also increase heating costs. Proper period house weatherproofing ensures your home stays warm and energy-efficient. Focus on these areas:

  • Replace worn or damaged weather strips around doors and windows.
  • Seal gaps or cracks with high-quality caulk.
  • Add draught excluders or heavy curtains for extra insulation.

This small investment in weatherproofing can save you money and keep your home comfortable.

Protect and Maintain Timber Features

Timber is a hallmark of period homes, but it’s highly vulnerable to moisture. Without protection, it can rot or warp, leading to costly repairs. Prevent these problems by:

  • Sanding and repainting timber trims, verandas, and window frames with weather-resistant paint.
  • Sealing exposed timber with a protective coat to block moisture.
  • Inspecting for signs of decay and addressing them immediately.

These actions are a key part of period home maintenance, ensuring your home’s charm remains intact.

Seasonal Updates to Improve Your Home

While maintenance is essential, autumn is also an excellent time to enhance your home’s style and comfort. Updates not only protect your home but also make it more enjoyable to live in.

Enhance Your Interior for Autumn

As the days grow shorter, creating a cosy atmosphere indoors can make all the difference. Consider these updates:

  • Lay down rugs on timber floors to add warmth and reduce heat loss.
  • Switch out light summer bedding for heavier duvets and blankets.
  • Incorporate warm-toned cushions, throws, and curtains to complement the season.

These small changes reflect the spirit of autumn-ready period home design.

Boost Outdoor Appeal

Autumn doesn’t mean neglecting your garden or outdoor space. With a little effort, you can prepare your exterior for the colder months ahead:

  • Trim back trees and shrubs to prevent branches from damaging your home during storms.
  • Plant hardy, seasonal flowers like pansies, violas, or snapdragons.
  • Protect outdoor furniture with weatherproof covers to prevent rain damage.

These steps add curb appeal and align with autumn home tips Melbourne.

Consider Larger Renovation Projects

If you’ve been putting off bigger projects, autumn is an ideal time to tackle them. Upgrading your insulation, restoring heritage features, or even renovating key spaces like kitchens or bathrooms can make your home more comfortable year-round. Look into seasonal home renovations for opportunities to modernise while preserving your home’s unique character.

The Long-Term Benefits of Autumn Prep

When you invest time and effort in preparing your period home for autumn, you’re not just addressing immediate concerns. You’re also building long-term value for your property.

Why Seasonal Preparation Is Worth It

Here’s how autumn preparation pays off:

  • Reduced repair costs: Preventative maintenance is far less expensive than fixing major issues.
  • Increased energy efficiency: Proper weatherproofing lowers heating bills.
  • Enhanced longevity: Regular care extends the life of your home’s features and materials.
  • Preservation of heritage value: Well-maintained period homes retain their historical significance and aesthetic appeal.

By taking steps to protect period home autumn, you’re safeguarding both its charm and its structure for years to come.

Frequently Asked Questions

1. How do I ensure my period home is protected from rain?
Focus on heritage home weatherproofing by sealing cracks, maintaining your roof, and clearing gutters regularly.

2. What’s the ideal frequency for gutter cleaning?
At least twice a year—once in autumn and once in spring. If you live in an area with lots of trees, you might need to clean them more often.

3. Can I manage period home maintenance on my own?
While you can handle tasks like gutter cleaning and sealing gaps, more complex jobs like roofing or timber repairs are best left to professionals.

4. What are the benefits of seasonal home renovations?
They keep your home functional, energy-efficient, and visually appealing while reducing the risk of expensive repairs.

5. How do I protect timber features in my period home?
Sanding, repainting, and sealing are essential. Regular inspections for signs of rot or decay are also critical.

Let Experts Help You Prepare Your Period Home

Preparing your period home for Melbourne’s autumn weather doesn’t have to be overwhelming. With the right mix of maintenance, updates, and care, you can preserve its timeless beauty and stay comfortable all season long.

But if you’re feeling unsure or need a hand with larger projects, why not call in the experts? The team at Period Extensions & Designs specialises in maintaining and enhancing period homes. From weatherproofing to modernising interiors, they’re here to help you achieve the perfect balance between tradition and comfort.

Don’t wait for issues to pile up—start your autumn preparation today and ensure your home is ready to weather the season in style!

Please call us today at Period Extensions & Designs on (03) 8658 1340 or make an enquiry.
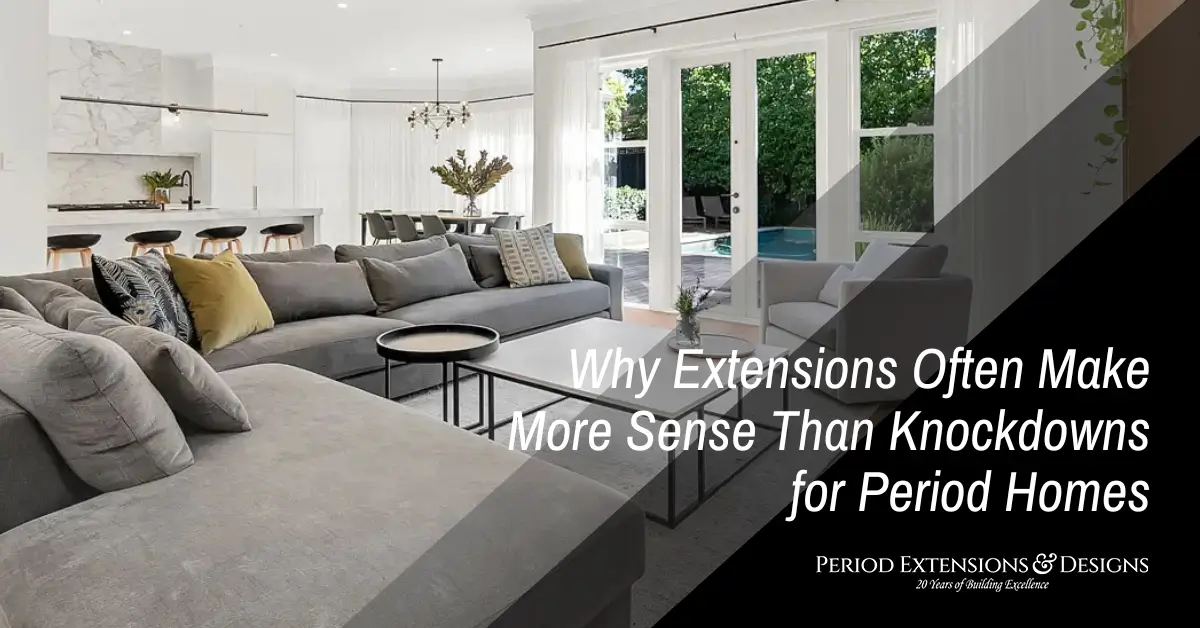
Add to cart
DOWNLOAD OUR

TOP TIPS FOR RESTORING YOUR HOME

With over 20 years in the business, we’ve seen and done it all. Download our FREE GUIDE to restoring your period home today.

Thank You!

One of our designers will give you a call as soon as possible.

Consultation Request